1 ITEMVIEW CART
Subtotal: $312.00
Green Egg Pork Rib Guide.
By: Kenny Martin
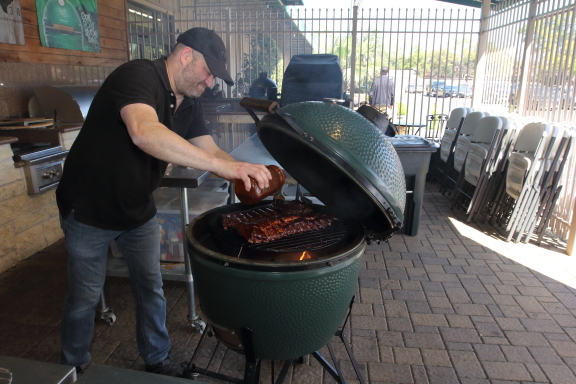
I consider Pork Ribs to be the 2nd piece of the BBQ triangle. From Baby Backs to a full Spare or trimmed St Louis, Pork ribs offer something for everyone, including a blank palette from which to use your creativity to apply rubs, brines and sauces. This guide will take you through the steps necessary to produce competition quality Ribs with your Big Green Egg.
Typical Pork Rib Prep and Smoking Process (4-7 Hours)
Trim Ribs, remove membrane (Optional) -10 Minutes
Light Charcoal and build Smoke fire – 30-60 Minutes
Season Ribs-Place in Fridge while Green Egg is settling in temperature
Place Ribs on BBQ-Smoke for 2-3 hours
Wrap Ribs in Foil or Butcher Paper (optional) and place back on grill for 1 hour.
Remove Ribs from foil or Butcher Paper and place back on grill for 1 hour.
Glaze Ribs and remove from Egg.
Cooking Concepts
Slow and Steady- Temperature range is 250-275. This is the sweet spot for smoking on the Green Egg for the following reasons. The Fire and Wood are burning at a rate that allows the oxygen and Lump Charcoal to burn at a steady and efficient pace. With proper charcoal and setup, this fire will burn for up to 12 hours, sometimes longer. This is my preferred smoking method for Ribs, as it provides a nice combination of smoke and heat, while creating a nice flavor profile. Expect 4-5 Hours of Cooking time depending on the types of ribs you are cooking.
The Texas Two Step- Starting temp is 250, which develops a nice smoke profile before we increase the temperature to 300 for the last hour. Apply a simple glaze or BBQ sauce and you are ready for Rib Nirvana. When used in combination with a wrapping strategy, the Two Steps produces excellent flavor, color and texture. Expect 3-4 hours of Smoke time.
Hot and Fast –SmokingTemperature is 300. Let’s face it, you’ve decided to smoke pork ribs on the same day with little prep and time is of the essence. We will throw caution to wind here and utilize the egg’s ability as a water smoker to smoke our Ribs in 2 – 2 ½ hours. If wrapping in foil, cut your wrap time to 30 minutes.
Concept Variations – Feel free to use any combinations of temperatures and wrapping strategies to create your own BBQ experience.
Tip – Baby Back Ribs cook faster thanSt Louis and Spares.Be Prepared.
BBQ Toolkit
Smoking Wood (See guide)
Baking Sheets or Aluminum pan filled with ½ cup of water. 15”x10”x 9/16” for Xlarge, 11”x9”x 1½“for large.
Rubber Gloves
Instant read thermometer. (Thermoworks MK IV recommended).
Aluminum Foil-Heavy Duty and Regular
Butcher Paper-Food Grade, unlined or unwaxed. (Optional) 24” width.
Spray Bottle for spritzing.
Rib Rack (Optional)
Grill Extender (Optional, but recommended) Standard or Eggspander
6” Boning Knife
Basting Brush-Silicon preferred.
Temperature control system like Flame Boss or BBQ guru(Optional)
Food Saver Vacuum sealer with 11” custom bags. (Optional)
Chimney Starters (Optional). I recommend two for the xlarge, 1 for the large.
Ball Jars (Optional)
Measuring Spoons
Metal Tongs
Rib Consideration:
Spare Ribs-Cut from the belly of the hog, these ribs offer tremendous flavor and connective tissue that are perfect for our smoking concepts.
St Louis Style-A trimmed version of the spare, they are rectangular in shape, and one of the most common ribs you will find in the meat case or at your local butcher.
Baby Backs-Cut from the loin or back of the Hog, Baby Backs are known for their meaty loin tops, as much as they are for popularity with restaurants. Cook time is typically less than St louis.
Rib Tips- Cut from the top of the pork spare rib, these little nuggets require some extra care, but produce tasty little bites.
Where to buy your Ribs:
There are many choices available in terms of meat quality, Heritage breeds (Duroc, Berkshire), as well as locally sourced pork. Baby back and St Louis Style Ribs range in price from 2.00-9.00 Per lb, with Heritage Pork carrying a premium price.
Rubs- My two cents on Rubs, make them from scratch. It’s fun, easy and leads to experimentation that will guide your taste buds. The base foundation of your rubs starts with Salt, Kosher to be exact., followed by equal parts coarse ground pepper. We follow up with our savory spices (Garlic Powder, Onion Powder), and finish with our sweet (Sugar) and heat (Cayenne).
Rub Ingredients:
Kosher Salt-Large Crystals.
Pink Salt or Prague powder#1 (Curing Salt)-Optional
Coarse Ground Pepper
Garlic Powder
Onion Powder
Paprika-Smoked or Sweet.
Chili Powder-Many variations here, use anything you like. Most Chili powders are a blend of dried chilis, cumin, garlic and onion powder.
Turbinado Sugar-I like the bigger crystals, plus it has a higher smoke point.
Cayenne Pepper or anything hot works here.
Brining – I will brine Baby Back Ribs and occasionally St louis Style Ribs. Baby back ribs have the leaner part of the loin on top which can dry out very easily. St Louis Style Ribs have more connective tissue and fat.
Curing – Just like curing bacon, this simple addition helps to tenderize and add incredible texture and flavor to our ribs. I typically use this for St Louis Style Ribs.
Vacuum Sealing – One of the best ways to intensify a dry brine and seal in flavor.
Glazes –. Glazes are fun to make and provide a nice finish at the end of your smoke.
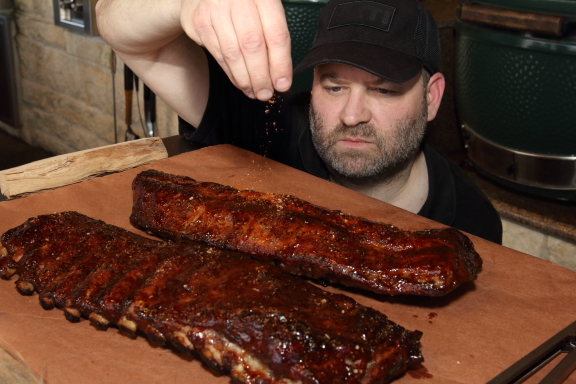
Finishing Dust – A slight sprinkle of Smoked Salt and brown sugar for a flavor pop.
Smoking wood: While there are many different types of wood you can use, I prefer to use Oak, Pecan or Hickory. Look for split pieces, sticks or chunks that will provide the necessary smoke flavor needed for a long smoke. Smoking chips work as well for the first part of your smoke and can be used in conjunction with the chunks or sticks. (About 1-3lbs of wood).
Hickory –Consistent burn and excellent flavor.
Post Oak –Consistent burn, butsometimes hard to find in Houston. Produces a very sweet mellow flavor that I really enjoy.
Red Oak –Hidden gem in my opinion. Burns slower than Post Oak, but wonderful flavor and great color.
Pecan -I love pecan, it’s my go to for Ribs and Pork.
-Let your eyes and nose be your guide when to place your Ribs on the EGG. When the smoke is white and smells pleasing to you, it’s ready.
Food Prep for St Louis Style or Spare Ribs

Food Prep-Baby Back Ribs
Ingredients:
2 Racks of Baby Backs.
Rub (Spices only, no salt) if brining first.
Brining Solution:
10 Cups of Water
4 Cups of Vegetable Stock (32oz)
½ Cup of Salt (Non-Iodized)
½ cup Granulated Sugar
Egg Setup: Proper Setup is a must when cooking your brisket.
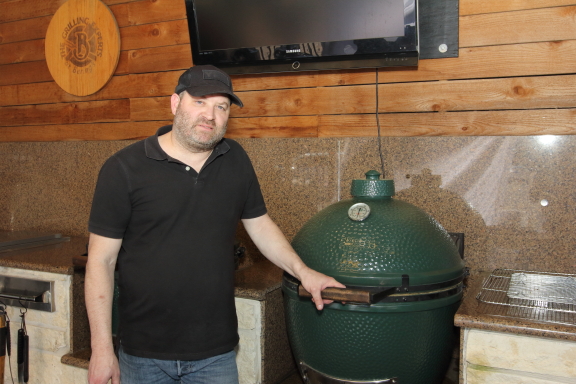
Big Green Egg as a Smoker – In order to utilize the Green Egg as a smoker, we need to understand the differences between your Green Egg and traditional Offset Smokers. The Ceramic lining in the Egg not only helps to maintain temperatures, but also helps to retain moisture (humidity) as well. In traditional offset smokers, the use of water pans is necessary to maintain moisture inside the smoker, thereby preventing the meat from drying out too quickly as convected air dries the surface of your ribs. Add a water pan full of water in your Green Egg and the added moisture prevents your meat from developing that nice bark we all love. Having said that, I find a drip pan with about ½ cup of warm water (should lightly cover the pan) is needed to gather fat drippings, which in turn provide the proper humidity inside your Egg. There are some variables depending on the desired smoking temperatures. Another consideration is the ConVeggtor itself. A cold ConVeggtor will take time to heat up, but as your Ceramics equalize temps, the heat coming from below will become greater the longer the smoke.
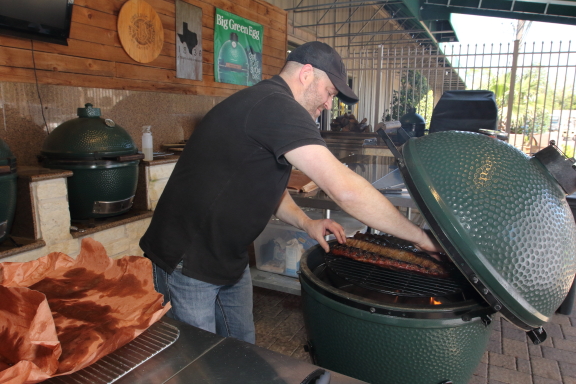
Building a Smoke Fire. It all starts with mastering the basics of building a smoke fire that will provide you with the knowledge necessary to smoke Meat, Seafood and poultry on your Green Egg. When it comes to smoking ribs, use fresh charcoal and save the leftover pieces for other shorter cooks. The most IMPORTANT part of smoking meat is the movement of heat, smoke and the water vapor. A stale fire with no air movement will only cook your Ribs like using an oven, but not impart that smoke flavor we desire. Smoke and its flavor particles are attracted to the imperfections that are present on the surface of the meat as well as cold and wet. We are looking for the combination of all three. The first 2-3 hours of smoking is when our Ribs will develop the majority of the smoke flavor profile we are looking for.
Fire Setup:
Humidity, Water and Drip Pans: While traditional Offset smokers use both a drip and water pan, we can utilize both by using a disposable 15”x10”x 9/16” for Xlarge, 11”x9”x 1 ½ “for large baking sheet. While Water ratios can vary from pit to pit, less is actually more with Kamado style smokers. This is attributed to the ceramic lining and sealed environment that helps to maintain moisture (Humidity) inside the Egg. Add to much water and your Ribs will never develop enough bark as the surface remains moist throughout. Add too little and the airflow and lower moisture can dry out the surface of your Ribs. Temperature also plays a role here, higher Smoking temps will evaporate water quicker than lower temps. A good rule of thumb here is as follows.
(½ cup boiling water for 250 degrees, 1 cup for 275-300 degrees)
Spritzing: After 2 hours of smoking, we want to take a peek and see how the surface of our Ribs are developing its bark and flavor profile. If you notice that its drying out to quickly, then I would spritz with water in order to gauge if I need to add more water to my drip pan.
Remote Monitoring/Instant Read Thermometers.
An instant read Meat thermometer will aid you in getting accurate readings from your Ribs. However, when smoking ribs, the surefire way to determine doneness boils down to feel. Instant read thermometers can give you a pretty good idea of where you are at during a smoke, but there are easy ways to determine if your ribs are done that involve some very easy to test parameters.
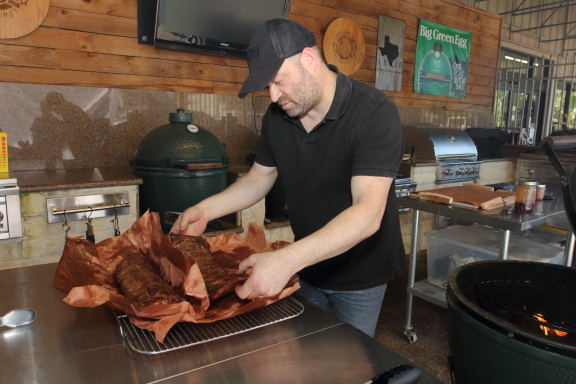
Wrapping:
The main reason to wrap your Ribs is to help your meat retain moisture, while speeding up the cooking process. The main difference between the wrapping methods has to do with texture and personal preference. Ribs that haven’t been wrapped are tender but have some chew to it. Aluminum foil is at the top of the list for tenderness with less chew, not to mention braising the ribs as well.
No Wrap: This method will work for slow and steady or hot and fast.The reason this works is due to the Egg’s ability to function like a convection oven and water smoker. Make sure to keep an eye on your water pan and fill as needed. You will need all the moisture you can get to keep the ribs from drying out too quickly. Additionally, you will need to start spraying your Ribs with and water/cider solution after a couple of hours on the Egg.
Aluminum Foil: If done correctly, your ribs will have a moist center with a nice exterior bark, if wrapped to long, your ribs will be very mushy. The trick to wrapping with foil is to wrap your ribs very tight. After 30 minutes in aluminum foil, I remove my ribs and place them back on the BBQ. Save the juice to make your serving sauce.
Butcher Paper: Same concept as Aluminum Foil, however the texture falls somewhere between unwrapped and Aluminum Foil.
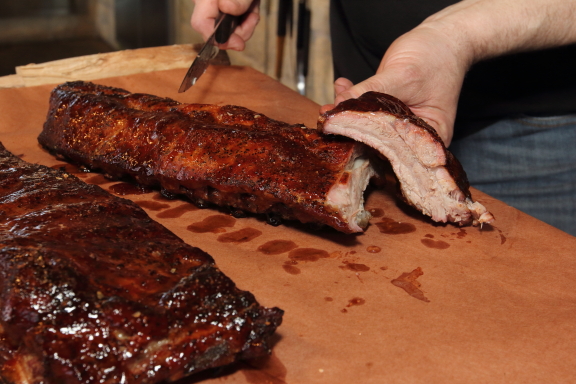
How do you know when your Ribs are Done: An Instant read thermometer should be your first option, followed by feel. St Louis style ribs can be held in the middle of the rack, and if they droop over and crack freely, they are typically done. Baby Back Ribs can be a little trickier since the loin on top will keep the ribs from flexing. Finished temps should be anywhere between 197-203.
Serving: Ribs are very easy to serve and only require a knife to cut down the center of the meat in between the bones. Let the ribs rest about 10-15 minutes before serving or wrap in butcher paper and place in a cooler to enjoy later.
BBQ Mop Sauce
1 Cup White Wine Vinegar
1 Cup Apple Cider Vinegar
1 Cup Ketchup
1 Teaspoon Valentina
½ teaspoon light brown sugar
¼ teaspoon Ground pepper
1 teaspoon salt
Food Prep:
BBQ Sauce
28 Oz Can Tomato Puree
1 Cup Ketchup
1 Teaspoon Worcestershire sauce
2 Tablespoons Brown Sugar
½ Cup Apple Cider Vinegar
¼ Teaspoon Paprika
¼ Teaspoon Chili Powder
½ Yellow Onion Diced
2 Garlic Cloves-Minced
Tablespoon Unsalted Butter or neutral oil (canola, Vegetable)
Salt
Pepper
12 Ounces of your favorite soda (Dr Pepper, Dublin Cola or Root Beer).
Food Prep:
BBQ Glaze.
Ingredients:
½ Cup Apple Cider Vinegar
½ Cup Ketchup.
½ Cup Light Brown Sugar
½ Cup Honey
1 Teaspoon Cornstarch
1 Tablespoon of your favorite rub
Food Prep:
Tips:
Line your Conveggtor with aluminum foil if applying sauce and glazes. This will keep your Conveggtor clean and free of grease smoke.
Lastly, Ribs are a lesson of patience, timing and execution. Master the process and you will be enjoying your own competition quality Ribs, not mention making a lot of friends and family very happy people.
Enjoy!


