Your cart is currently empty.
How To Make Decadent Macarons
Making decadent macarons is the perfect weekend activity to enjoy with loved ones, children, or friends! Not only are they fun to make, you will love to indulge in the deliciousness of these dainty and delicate cookies once they are finished! Even more, macarons are a colorful, beautiful and luxurious treat to decorate your kitchen & to enjoy when company comes over. Everyone will be very impressed that you made these homemade treats yourself!
You’ll love this macaron recipe by one of our favorite local Houston bakers, Monica Eskridge at Paper Flour Ink! Thank you Monica for sharing your favorite macaron recipe & tips on making the perfect macaron cookies. While macarons can be quite finicky to make, once you’ve mastered the art of making these delicious cookies, you’ll love adding these sweet treats as a decadent staple to your baking repertoire.
What is a macaron?
Originally made famous by the French, a macaron is a delicious cream filled cookie sandwich that will make you feel as if you’re in Paris! A macaron (pronounced mack-a-ROHN) is a dainty, sweet, stylish, and delicious dessert made of two round, flat and almond-flour-based cookies neatly set between an emulsified filling like ganache or a sweet buttercream. The beautiful variations in color of these cookies is simply a variation in the sweet filling and color of the almond-flour cookie shells.
One thing is for sure… you cannot get away with eating just one!
How To Make Decadent Macarons: You’ll Love This Recipe!
It’s time to gather your ingredients for these perfect & decadent macarons. You’ll only need a few ingredients to make these delicious sweets.
Paper Flour Ink Macaron Shell Ingredients:
- Super fine almond flour – Be sure you’re using a super fine almond flour and not an almond meal. Almond flour is made from much finer and blanched almonds, which contains no almond skins. This keeps the macarons smooth and picture perfect.
- Powdered sugar – Powdered sugar will thicken and sweeten your macaron batter, giving it the perfect consistency.
- Granulated sugar – Granulated sugar will whip your egg whites into the perfect peaks for this batter.
- Egg whites (105 g) – Measuring your egg whites out by weight will ensure you have the perfect ratio for making these macarons. Just ensure no egg yolks are left in your separated egg whites.
- Food coloring (1-2 drops) – If you want to bake vibrant & colorful macarons you’ll just need a few drops of food coloring of your choice. For this recipe we’re going to use a soft pink color.
- Extract (1/2 tsp) – your choice! We love a good vanilla or almond extract for a basic macaron, but feel free to switch it up for a delicious variation.
Kitchen Utensils for Macaron Shells:
- Kitchen Scale
- Sifter
- Bowl or mixer
- Spatula
- Pastry bag fitted with 1/2-inch round tip
- 2 baking sheets
- Silicon mat
- Baking template
Step by Step: How To Make Paper Flour Ink Macaron Shells
This recipe makes 15 pairs of decadent and delicious macarons.
Step 1: Weigh out all macaron shell ingredients on a kitchen scale. Macarons are very precise, so if you want to ensure yours are not only delicious, but beautiful it’s incredibly important to follow these measurements to a tee.
Step 2: Triple sift together the 138 g of almond flour and 125 g of powdered sugar and set aside. Sifting is a process that breaks up any lumps in the flour and areates it at the same time, giving your flour the perfect consistency for macarons.
Step 3: Place 105 g egg whites in bowl or mixer
Step 4: Measure 105 g granulated sugar in small bowl and set aside
Step 5: With just egg whites in your mixer, start the mixer on high for about 45 seconds, until foamy.
Step 6: Add ⅓ of your 105 g granulated sugar and mix on high for 1 minute.
Step 7: Add the second ⅓ of your 105 g granulated sugar and mix on high for 1 minute.
Step 8: Add the last ⅓ of your 105 g granulated sugar and mix on high for 1 minute.
Step 9: Add in 1-2 drops soft pink food coloring (or any color of your choice)
Step 10 (optional): Add ½ tsp extract of your choice
Step 11: Add in the almond flour/powdered sugar mix that you sifted earlier and fold together with a spatula until consistency of lava (do not overmix!)
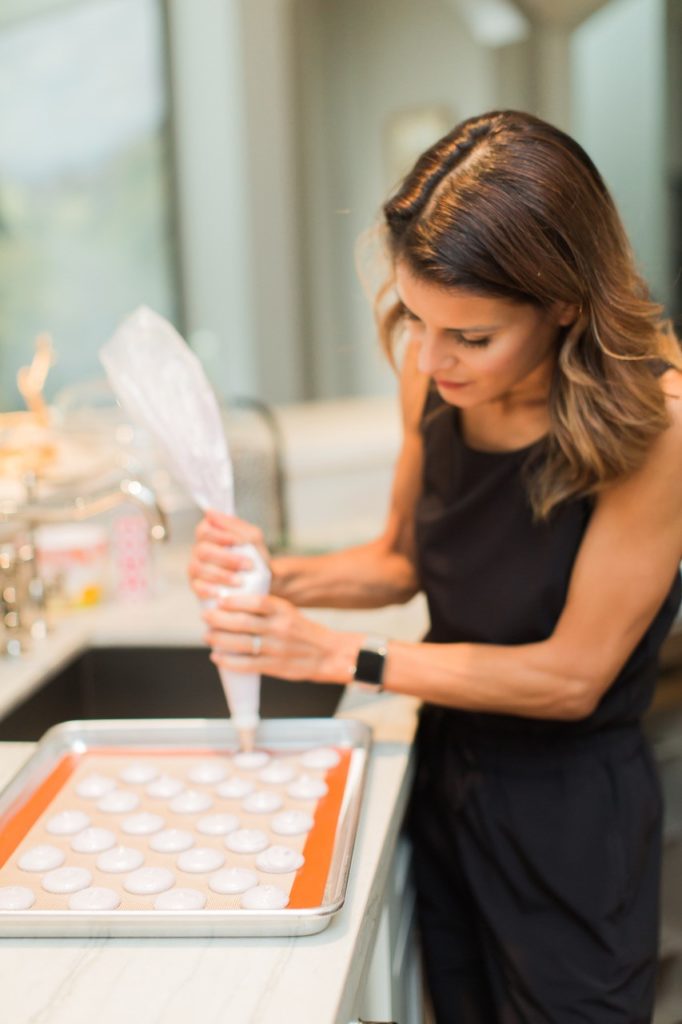
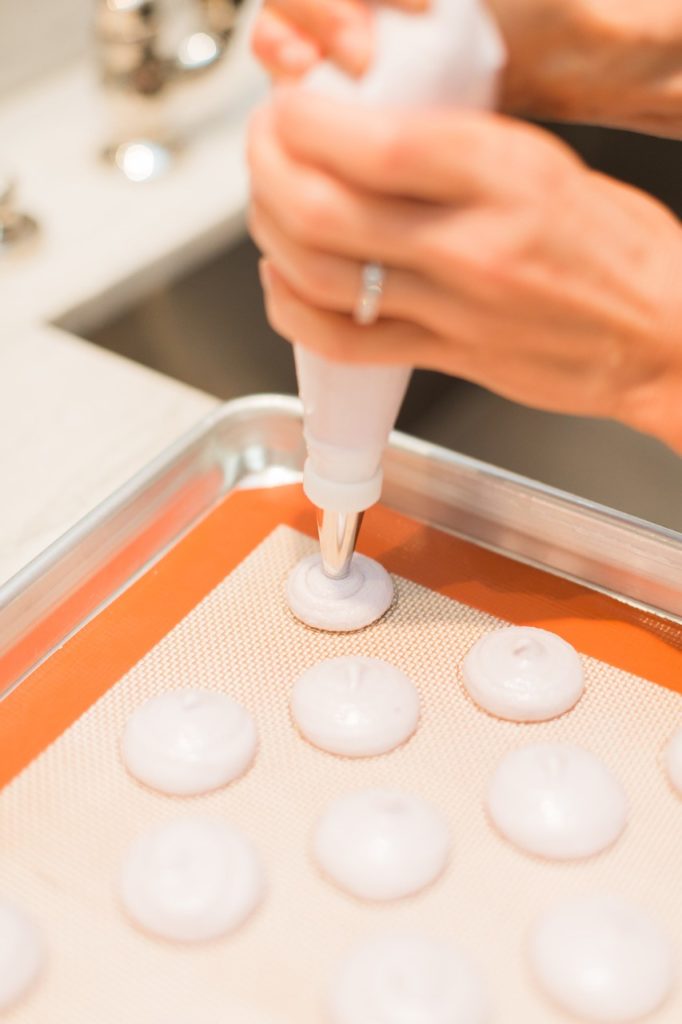
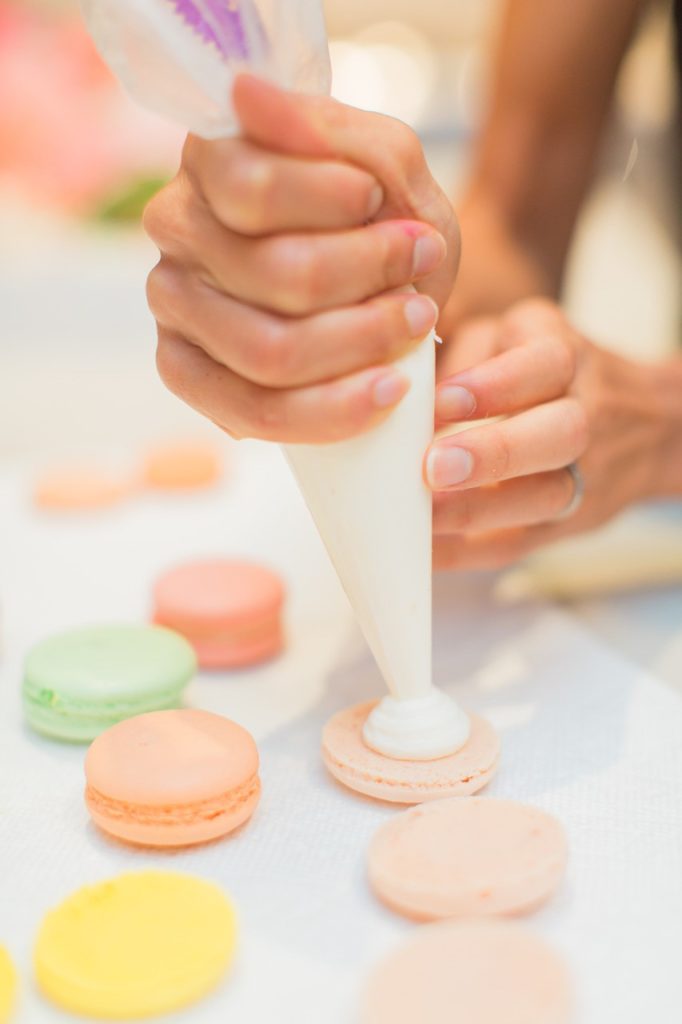
Step 12: Take a pastry bag fitted with a ½-inch round tip and fill with the batter. Line 2 baking sheets with a silicon mat with a template underneath the mat and pipe batter into ¾-inch round circles. Tap the baking sheet firmly against the counter to release any air bubbles.
Step 13: Let macarons stand at room temperature for 40 minutes until they form a skin.
Step 14: Remove Template! Do not bake macarons with templates still underneath. This is very important.
Step 15: Place in the oven and bake at 300 degree oven for 16-17 minutes, until the shells do not move when touched. Cool on cooling rack
Step 16: While your macarons are cooling, it’s time to make our filling.
Paper Flour Ink Strawberry Buttercream Filling Ingredients:
- 1 cup freeze-dried strawberries or 1 1/2 cups (200g) chopped fresh strawberries
- 1 cup (224g) unsalted butter, room temperature
- 4 cups (460g) powdered sugar
- 3-4 tbsp (45-60ml) water or cream, if needed
- 1/2 tsp vanilla extract
- Pinch or two of salt
Kitchen Utensils for Strawberry Buttercream Filling:
- Food processor or blender
- Small sized saucepan
- Spatula
- Standard measuring cup
- Large measuring cup
- Large mixer bowl
- Tablespoon
Step by Step: How To Make Paper Flour Ink Strawberry Buttercream Filling
If using fresh strawberries, follow the first 3 steps. If using frozen strawberries, skip to step 4.
Step 1: If using fresh strawberries, add the strawberries to a food processor or blender and puree until smooth. You should have about 3/4 cups of puree.
Step 2: Add the strawberry puree to a small sized saucepan and cook over medium heat. Allow the mixture to come to a slow boil, stirring constantly to keep it from burning, until it has thickened and reduced to about 6 tbsp, about 10-15 minutes. To measure, pour the puree into a measuring cup. If it’s more than 6 tbsp (between 1/4 and 1/2 cup), add it back to the pan and continue cooking.
Step 3: When the puree has thickened and reduced, pour into a large measuring cup and allow to cool to at least room temperature. This strawberry mixture can be made ahead, if you like, and stored in the fridge.
Step 4: If using freeze dried strawberries, add them to a food processor and grind into a fine powder. Set aside.
Step 5: Regardless of which version you’re making, add the butter (and shortening, if using) to a large mixer bowl and beat until smooth.
Step 6: Add about half of the powdered sugar to your large mixer bowl and beat until well combined and smooth.
Step 7: If using the strawberry reduction, add about 3 tablespoons of the reduction and beat until well combined and smooth. If using the freeze dried strawberries, add the powder and about 3 tablespoons of water or cream and beat until well combined and smooth.
Step 8: Add the vanilla extract and slowly add the remaining powdered sugar and beat until well combined and smooth.
Step 9: Add additional strawberry reduction/milk or cream until your frosting is the right consistency. Use your frosting on cakes, cupcakes, etc. Frosting can be left at room temperature for 1-2 days, but if you aren’t using it right away, I recommend refrigerating it for up to a week or freezing it for about a month.
How To Assemble The Paper Flour Ink Macarons:
Utensils for Assembling Macarons:
- Piping bag with round tip
Now that we have allowed our macaron shells to cool and finished whipping up the decadent strawberry buttercream filling, it’s time to assemble our macarons.
Assemble Macarons: Transfer the strawberry buttercream filling into a piping bag with a round tip. Pipe a swirl of filling on half of the cookies. Sandwich cookies together with the remaining halves.
Why We Love The Paper Flour Ink Macarons
We absolutely adore Paper Flour Ink and Monica’s decadent and beautiful sugar-filled designs! We are so grateful to have Monica fill us in on her recipe and incredibly detailed tips on making these delicious and dainty macarons. While macarons can be finicky to make, following this recipe carefully will help you create a macaron masterpiece. We’ve linked some of our favorite kitchen gadgets and utensils to help you make this wonderful recipe at home. Happy baking!
Love,
The Bering’s Team
hot products